Publishing your first component
Learn how to use uipkg Figma plugin to publish a React component to uipkg.com.
It all starts from a Figma component
uipkg works with Figma components, which are a special type of element. They are already pretty similar to React components as you can create instances of them, pass properties and override them.
Here's an example of a Figma component:
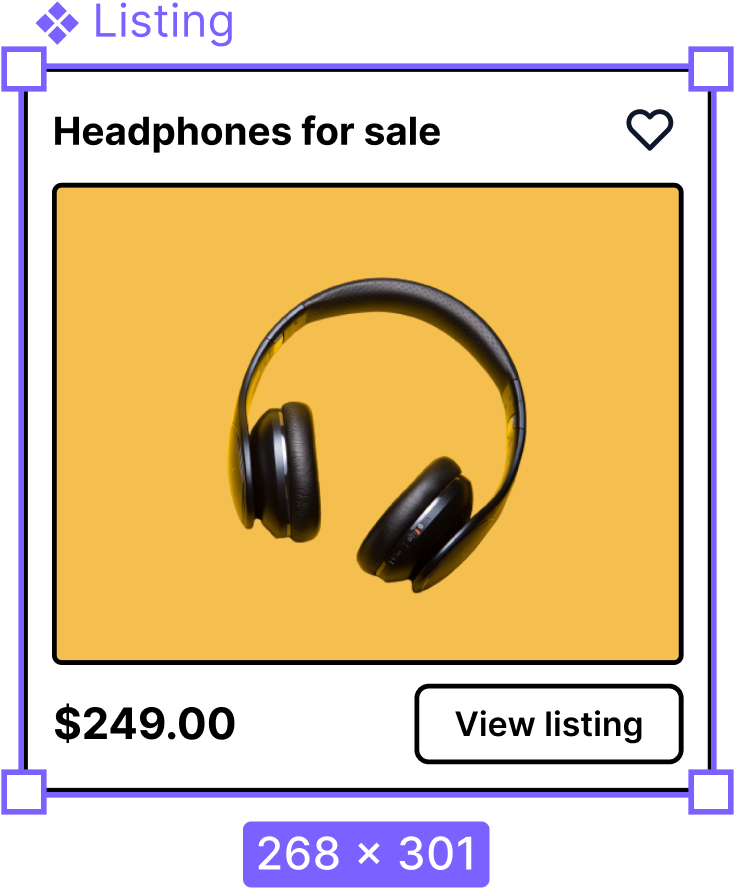
You can tell it's a Figma component if it has a purple outline and a specific icon next to its name.
In Figma, you can right-click on any element and select "Create component" from the dropdown to convert that element to a component.
Generating React code from Figma
For this step you need to sign up for uipkg and install Figma plugin.
Now that we know how to create component elements in Figma, it's time to convert them to React components!
Grab a copy of this Figma file and fire up uipkg plugin by right-clicking anywhere on the canvas and choosing Plugins → uipkg from the dropdown.
You can launch plugins with a keyboard shortcut
macOS: CMD+P and type in uipkg
Windows: CTRL+P and type in uipkg
Seeing the code
Now that plugin is open select Listing element in Figma and the plugin screen should change to this:
What you are seeing here is the properties tab where you can customize what props are passed to your component, we'll get back to it a bit later, for now, let's switch to Code tab and inspect the code.
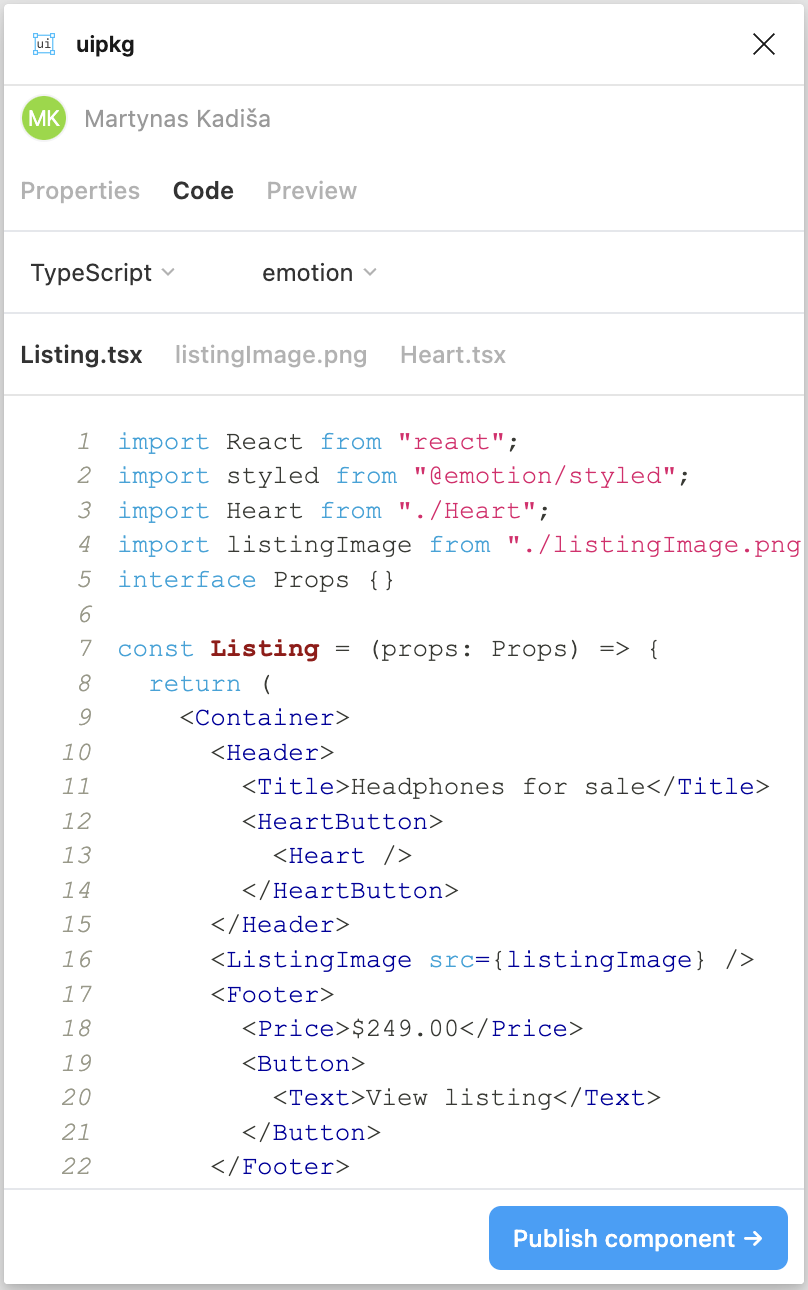
uipkg analyzed the selected element and generated a React component from it. If you look closely at the names of the tags, they are the same element names that appear in Figma's left sidebar.
In addition to seeing the generated code, you can also customize uipkg output by choosing which language and styling option should be used.
Available languages:
- TypeScript
- JavaScript
Available styling options:
- Emotion
- TailwindCSS
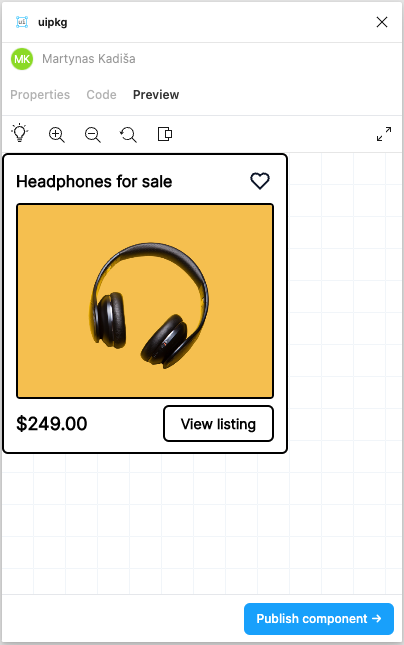
Live preview
Click on the preview tab and you'll see your newly generated component being previewed live in a browser!
Publishing to uipkg.com
Once you are satisfied with the generated component you can click on the "Publish component" button at the bottom of the plugin window. This will allow you to change the package name (it defaults to the component name in Figma) and choose which organization you want to publish it to.
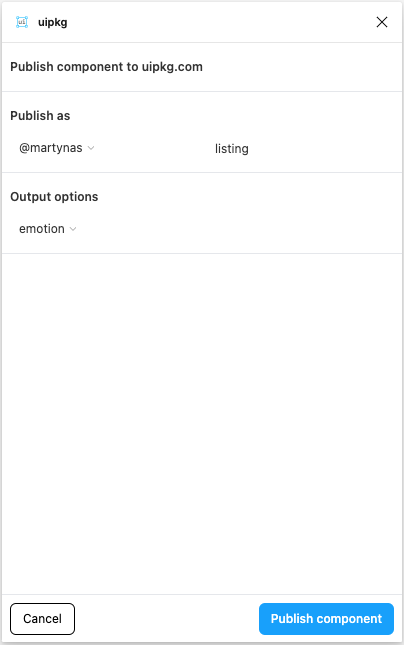
Hit the "Publish component" button again and it will start publishing it. When it's done it will show you a one-liner to install this component. We can't install it yet, we need to teach our package manager (e.g. npm) to know how to look for uipkg packages, we'll learn how to do it on the next page.
So what exactly happened here?
uipkg generated React component from your Figma design, created an npm package, and published it to uipkg registry. Your shiny new component even has a dedicated page for it, let's check it out by clicking the "Open in uipkg" button (or you can just open uipkg.com and look for it under packages).